Saturday, May 26, 2012

Remote power button


Visual layout


I recently set up my projector to enjoy movies more comfortably from my couch. To do this I decided it would be awesome to "hide" my projector inside of the closet that comprises almost an entire side of my apartment. I wanted the video quality from my computer to be halfway decent on the projector, so I decided to move the computer into the closet as well so it could sit next to the projector, and maintain a short run of cable. At the same time, I still wanted to be able to sit at my desk and use my keyboard and monitor like a normal computer.

Room Layout
This was accomplished by getting some cables from Monoprice.com. But I still had the nagging problem of always walking into my closet, and reaching to the shelf my PC is on, to turn on the computer. So I decided to install a remote power button into my desk, using a button I had bought for this exact purpose a couple of years ago. It is a particularly awesome button.

I spend some time this past week drilling a hole into my desk (which is basically extruded steel), into which I could mount the button. My first attempts consisted of using regular drill bits followed by a Dremmel to widen the hole (to .75 in). It only took me about 10 minutes of grinding away at the desk to realize I was using the wrong tool. So I went online and ordered a set of step drill bits. They arrived last night.


I managed to finish the job in another ten minutes. Nothing feels quite like using the right tool for the job. I mounted the button and proceeded to wire it up. Crossing my fingers and praying that the computer circuit just needed a normally open dry contact, I attached the button (I had left my multimeter at work), in parallel with the PC button pins. It worked!


Another lesson learned long ago, is conscientious wiring. I used a screw terminal on the outside of the PC case, followed by jumpers inside. So if I ever need to open my case later, I can just disconnect the wires inside to not be bothered.

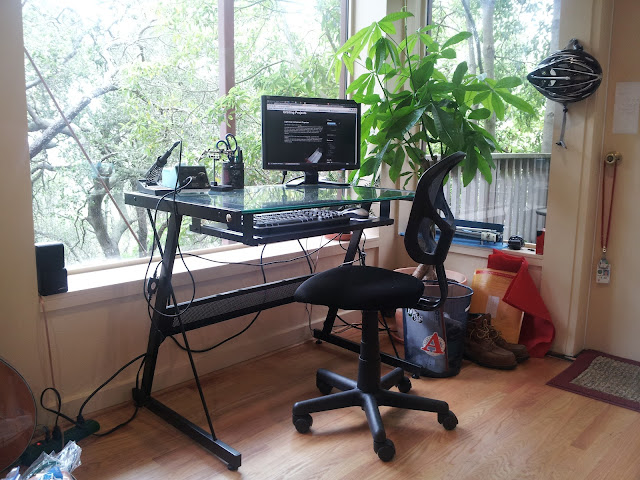
I finished the wiring job and cleaned off my desk (killing two birds with one stone), to take some pictures. I really like how clean my setup is now (in both senses).


Friday, May 4, 2012

Light-It-Up Component Organizer

I got the idea for doing this from this guy: http://www.instructables.com/id/StorageBot-voice-controlled-robotic-parts-finder/ . After seeing that video and learning about the TLC5940NT (a 16 bit PWM driver which can be daisychained to even greater orders), I felt inspired to finally clean up my lab supplies. I have too often felt disrupted by not having parts when I thought I did, and not knowing where those parts were when I needed them. With this system I will hopefully solve both problems, as my entire inventory will need to be recorded, and organized.

Designing the PCB's for the control circuit was simple enough. I just followed these diagrams: http://code.google.com/p/tlc5940arduino/. The main challenge so far in the project is keeping costs down while retaining a higher level of quality than I have adhered to in my projects so far. I have a bit more money to invest in this project, so I intend to make it as clean as possible.


Here's a picture of my proof-of-concept. The trouble with clear drawers is the light cross-talk between drawers when they are lit from the rear. To solve this issue I taped some aluminum foil around the drawer like a hotdog bun.  This solves the issue in the left, right and down directions, but all the drawers above it are still lit. So by adding a second hotdog bun to the drawer above, the original drawer becomes a light-pipe of sorts. I really like how the drawer is fully lit, with the light completely diffused. Of course when the idea is actually implemented I will be using a silver paint and not foil...

I also tested how the concept worked when actually filled with items and I am pleased to say that it works quite well. More on that later.

I started working on the LED backplane last night. I had designed a PCB to accomplish the task, but actually having the PCB made was going to be far too expensive. So I went ahead and tried to etch my own board. The size of the design proved to be too much for the process. I could not get the resist layer to adhere very well to the clad. So I have started making the PCB manually from proto board. It is about as much fun as counting grains of sand. To ease (or add to?) the tedium I bought "Atlas Shrugged" on audiobook. So far, 8 LED's (out of 64) are connected... this project will take some time...


Monday, April 30, 2012

Tesla Coil Overhaul

I spent some time this past weekend fixing my Tesla coil named Zeus. It is a 450W SRSG (synchronous rotary spark gap) coil that can usually produce sparks up to 800cm. Around a month or two ago I was running the coil, having just replaced the transformer (an old Franceformer), when a capacitor failed. The capacitor might have failed due to bad timing on my spark gap (some adjustment will be necessary in the future), or due to my gross oversight in the original design. The original capacitor bank was designed such that the first capacitor and last capacitor in the series were very close to each other. The potential became great enough that the first capacitor failed in a spectacular display of electrical arcing to the leads of the last capacitor.


I have since overhauled the entire capacitor bank, changing the design to keep distances maximized. While I was finishing the capacitor bank I decided to go ahead and overhaul the entire coil's wiring. Prior to the decision I had been using crimp terminals to connect wires on the coil. These shoddy connections caused the coil to be very unreliable. A demonstration item like a Tesla coil should work perfectly every time. To have it fail as a result of bad connectivity is disappointing.

After finishing the overhaul of the capacitor bank and the coil wiring I was ready to test. Usually when testing the coil I can count on the thing to refuse to start for a bit. Often it starts at around 80-90VAC as read on a variac, however, with the recent improvements the coil consistently started around 40V. I was able to achieve sparks at this voltage which was a first.

I expect that I will not have trouble with starting the system. Next I will need to develop a better spark gap but until then...

Saturday, January 21, 2012

MP3 Grabber

There is a website called mp3panda.com, of dubious legality, but that's irrelevant for this post. If someone were to want to download songs from the mp3panda, and they were unfortunately not on an updated system or were running linux, they would not have the convenience of using mp3panda's auto-download software.*

So they would have to resort to manually clicking each download link, selecting the location to download and waiting for each download to finish, so as to not overwhelm their internet connection. Talk about some serious tedium.

I decided today to create a python script that will run on linux and download all the mp3 files from the download page of your account. The only manual labor involved is navigating to the downloads page, expanding the links, saving the page to a working folder, and running the script.

The script is only about 100 lines of code, and takes care of downloading and organizing your downloads into folders. Anyone familiar with python should be able to customiz this to suit their needs.

I used a variety of packages, BeautifulSoup, eye3D, os, time, etc... BeautifulSoup is great for parsing html structures. eye3D was used to gather the mp3 metadata for organizing the files.

Mp3 Grabber

Cheers

*Perhaps the software would run on wine...